
We all have fond memories of drawing all sorts of pictures with wax crayons, but these days we’re a bit old for playing with them aren’t we? You’re never too old to create something amazing out of crayons, but there are better ways to do it than just drawing. Melted wax crayon art is easy and cheap to make, and it makes for great decoration. Follow these simple steps and you can make your own at home.
What You Need
First things first, you need to get together all of the items that you need, the list is fairly short.
- A blank canvas - You can buy these fairly cheap at any craft shop.
- Crayons - They need to be wax ones, it doesn’t matter if they are old or new but short ones won’t get you very far. It takes around 30 to cover a canvas for an 8” x 10” canvas.
- Hot glue gun - You can get one online from places like Glue Guns Direct, make sure you get a good quality one, otherwise the crayons will come off after a while.
- Heat Gun/Hairdryer - You could invest in a proper heat gun if you want to, it will melt the crayons faster but a hairdryer will do just fine if you don’t want the extra expense and you’re willing to wait a little longer.
Step 1 - Prepare The Canvas
Before you do anything, put something down on your work surface, it’s going to get messy and melted on wax crayons are a pain to get off.
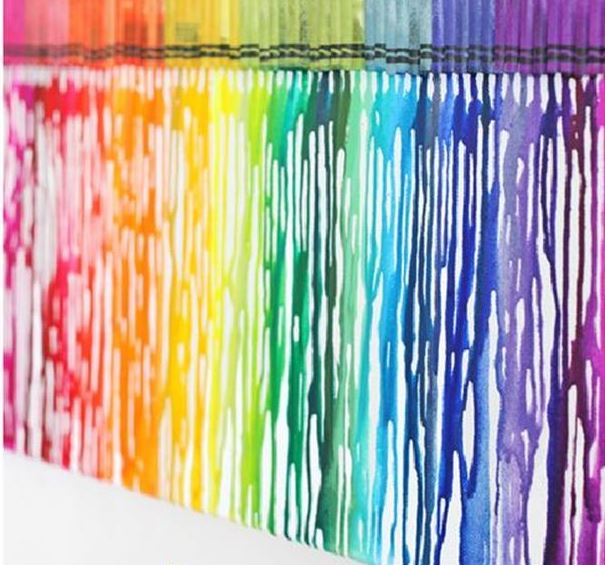
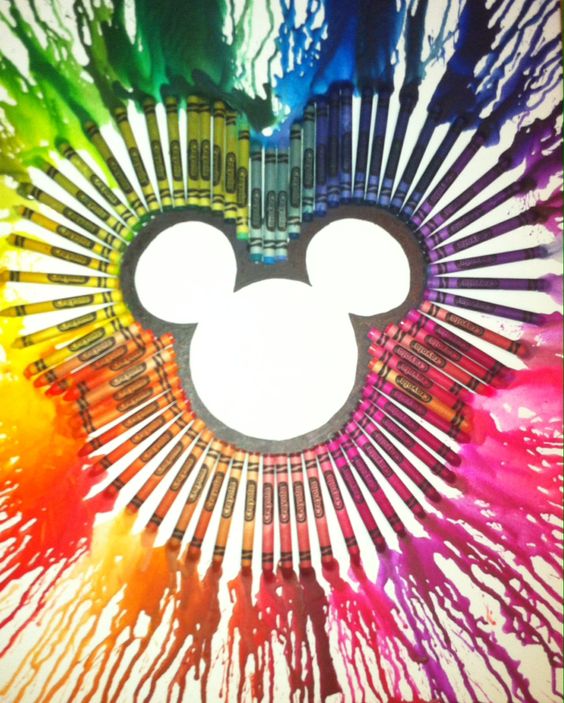
Next, start laying out the crayons and seeing what designs you can make. You could go for a classic rainbow formation but there are plenty of other things that you can do. Think about which colours will look good when they are melted next to one another and choose ones that will look ok if they mix, otherwise you could end up with lots of browns. One good option for arranging the crayons is to do them in a colour gradient, going from dark to light or vice versa.
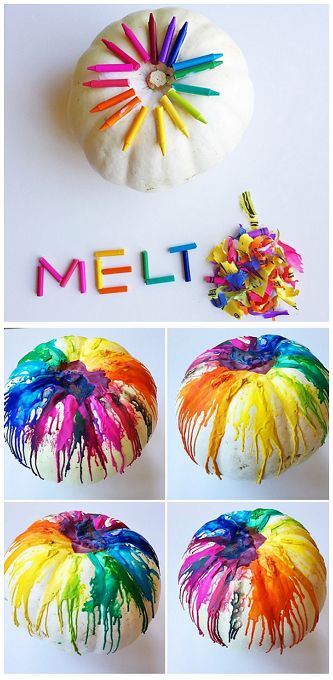
Once you have decided on a pattern, use a knife to slit the paper on the crayon and it should come off fairly easily...personally I like the papers left on, but look at the pumpkin below, it looks fabulous with just the wax melted down the edges!
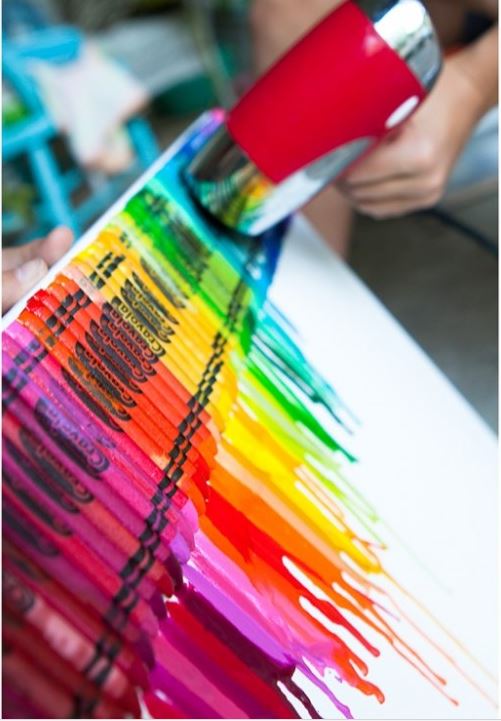
Unwrap them all and then start gluing them down with your glue gun. You can leave the wrappers on if you prefer, it still gives a good effect.
another idea, but the possibilities are endless!
Step 2 - Melting
After you’ve glued them all down, you’re ready for the fun part. Prop the canvas up with something so it’s at a slight angle, don’t make it too steep though. Then start melting the crayons with your heat gun or hairdryer. If you’ve left the wrappers on, direct the heat at the uncovered parts. They will soon start to drip down the canvas. Continue until you are happy with the result and then lay the canvas flat again so the drips stop. Let it cool for a few minutes and then you’re ready to put it on display!
If you try this, Please let me know how you got on!
Have fun!
Love Happy x
No comments
Thanks for leaving a comment...I really do appreciate your kind words xx
Note: only a member of this blog may post a comment.